


Resistance Gardening Tip: Use Ollas
Waterwise and Efficient Irrigation for Any Garden

This week’s Resistance Gardening Tip is important especially for those of us who have to irrigate our gardens. Using water-wise methods and practices that are nearly plastic-free, simple to employ, and that are incredibly efficient go against the status quo. Ollas are particularly helpful for Team Veggie. That’s where I use them most often, and I’ve had huge success.
And a note: with the exception of Lowe’s, all of the olla sellers I have listed here are small businesses. Always a bonus if you are looking to buy a few!
I’ve spent most of my gardening life in hot, dry places. First it was Sacramento, California. Then Los Angeles. Now I’m outside of Denver, Colorado. As a gardener, I’ve had to learn how to be water-wise and use water as efficiently as possible.
That need led me to experiment with various irrigation techniques and ideas from around the world. One day, while living in Southern California, I visited a place called the Urban Homestead in Pasadena. It's a working farm on a standard city lot—and incredibly inspiring. They grow all kinds of produce, but what stuck with me most was their use of ollas to irrigate the entire farm.
Learning about ollas from the Urban Homestead transformed my gardening practices. Today, I’m going to show you how I use them in my own garden. I’ll walk you through a variety of systems, including an easy DIY method, and explain how I incorporate ollas in different contexts. My hope is that you’ll be inspired to try them in your garden too.

What is an Olla?
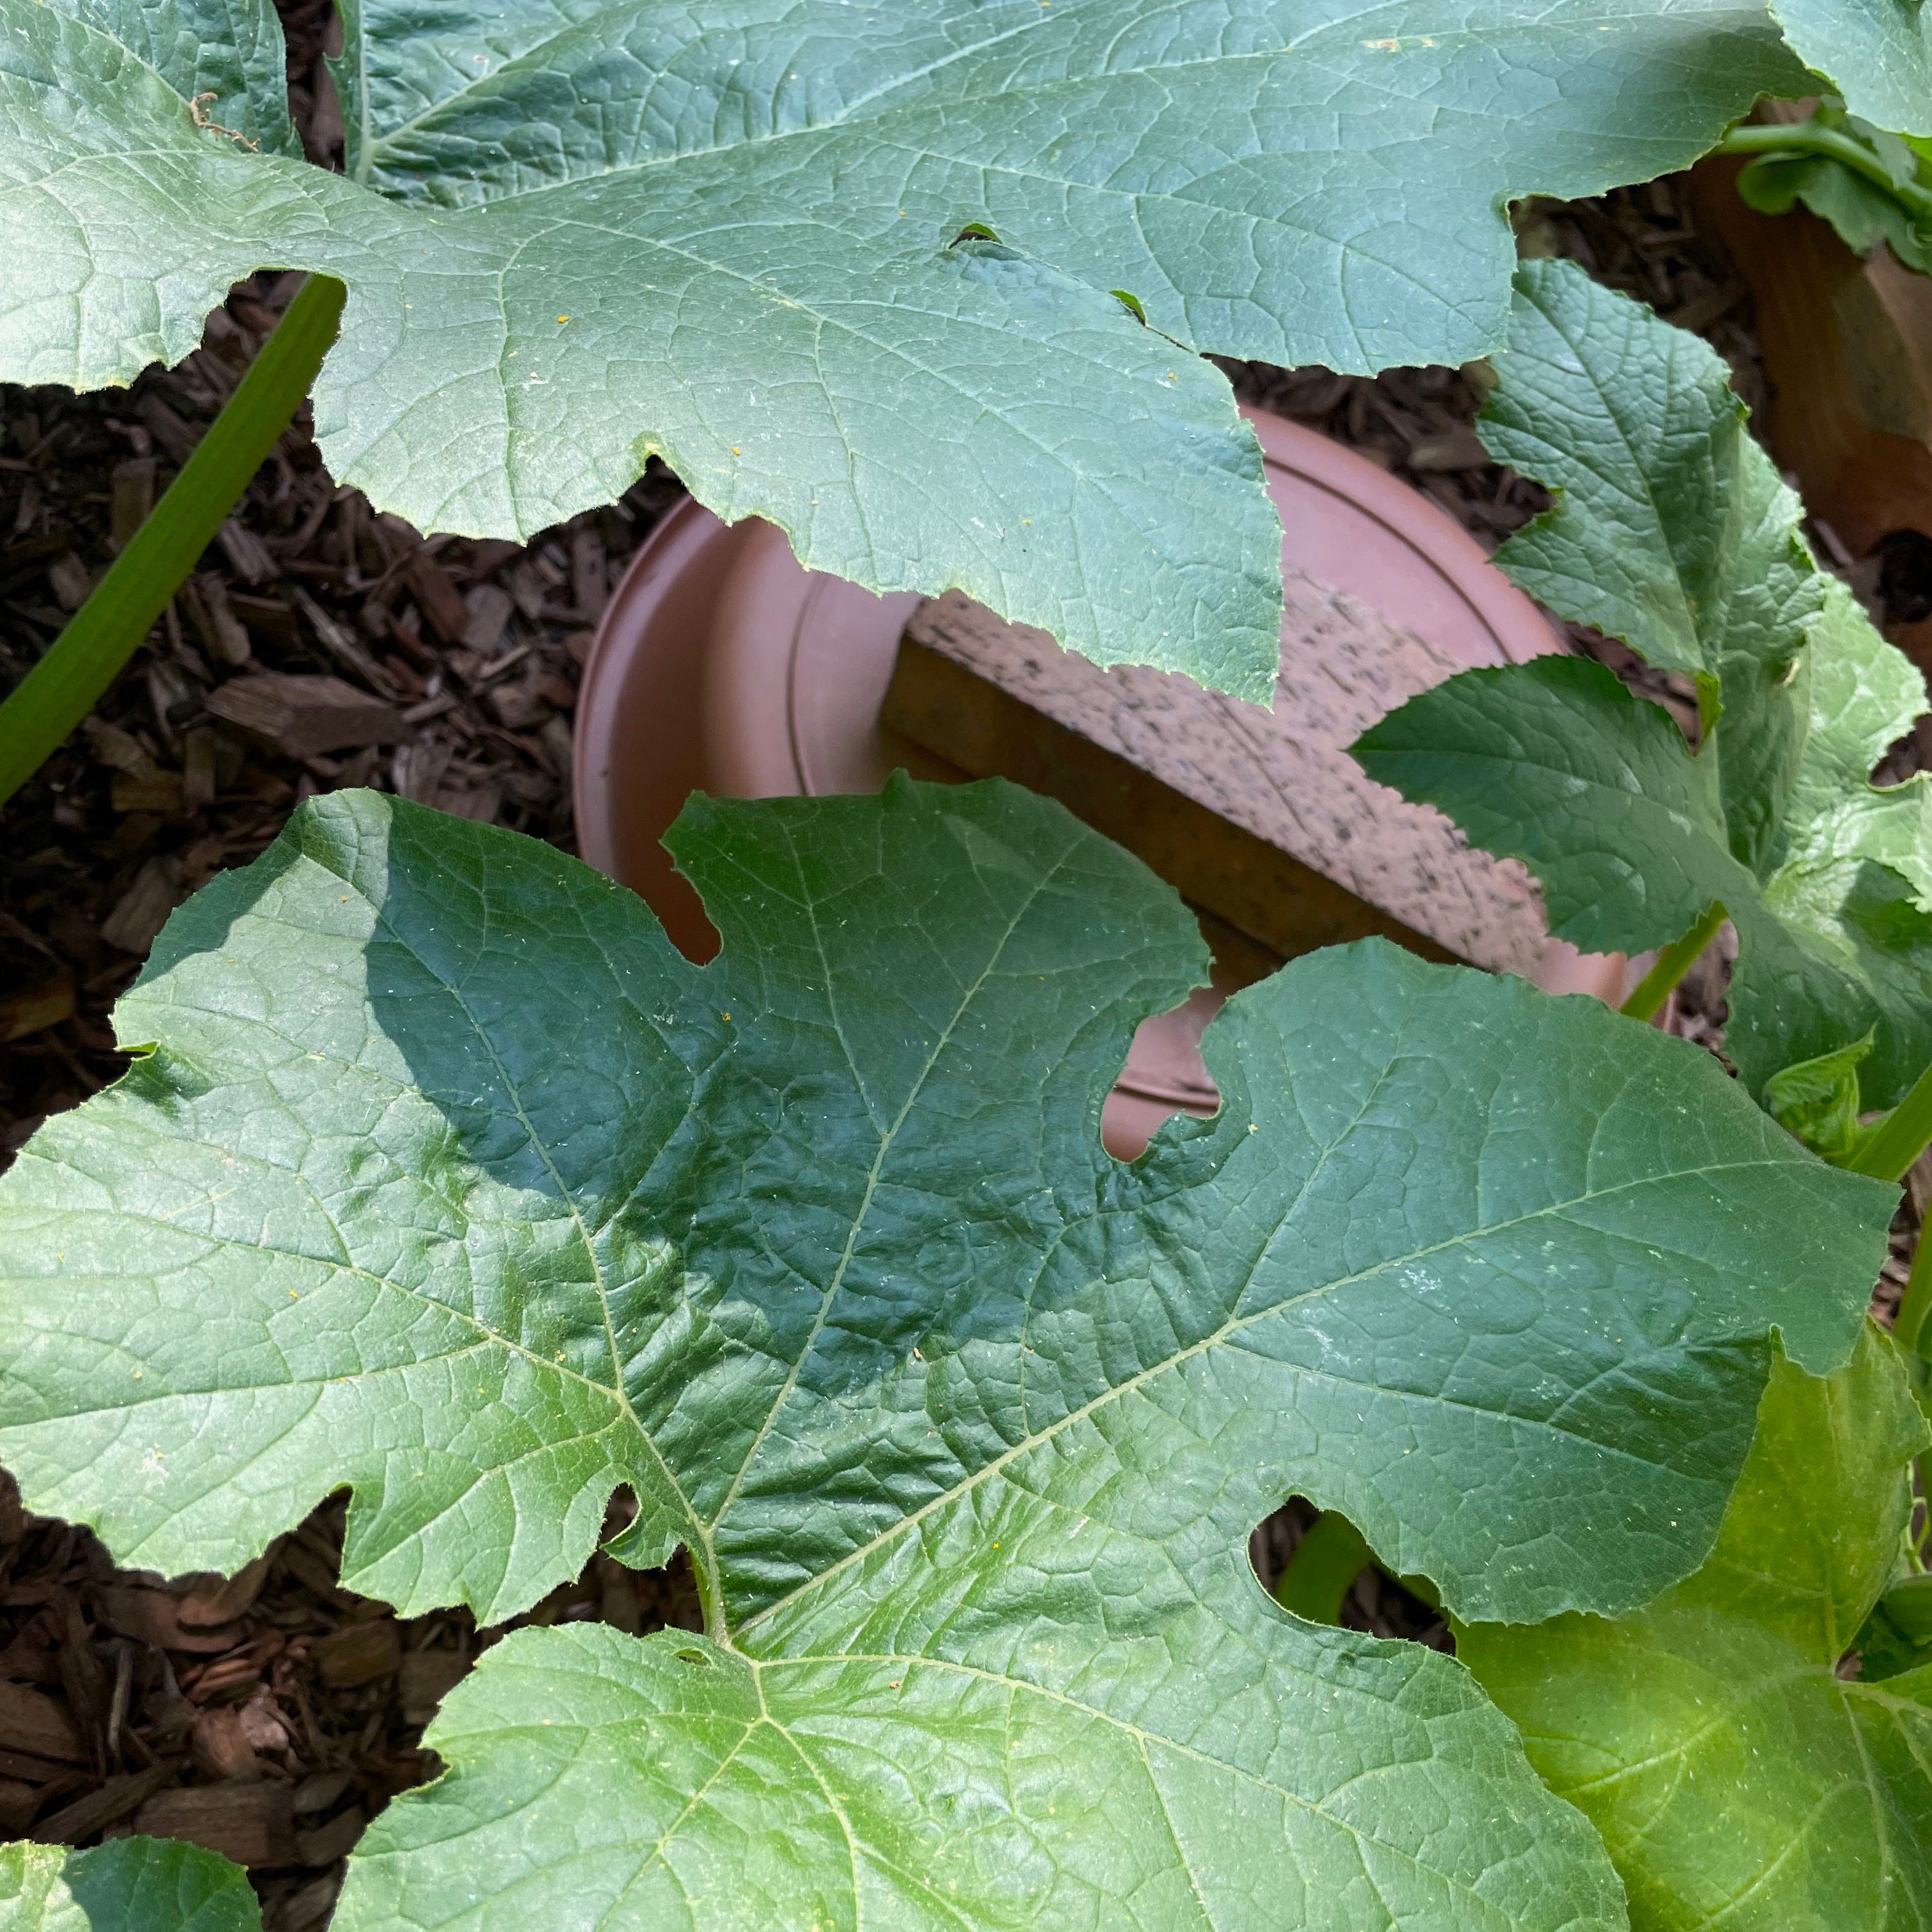
An olla is an unglazed terracotta pot that you bury in the ground. Because it’s unglazed, when you fill it with water, the moisture seeps slowly into the dry soil around it, creating an irrigated zone directly where plants need it most—at the roots. Ollas come in different shapes and sizes, but they all function using this same principle.
Here’s the magic: if the surrounding soil is already saturated, the water stays in the olla. Once the soil begins to dry, water starts to seep out again. It’s passive, responsive, and efficient—almost like magic, though backed by solid science.
Ollas have been used for thousands of years in arid regions around the world, including by Native American communities and cultures in China and the Middle East. As our climate changes and gardening becomes more challenging in dry regions, ollas are worth revisiting.
Why Choose Ollas?
There are several advantages to using ollas:
Water Efficiency: They only release water as needed. Unlike sprinklers or drip irrigation, they won't overwater.
Targeted Irrigation: Water goes straight to the roots—not the leaves or soil surface—reducing evaporation.
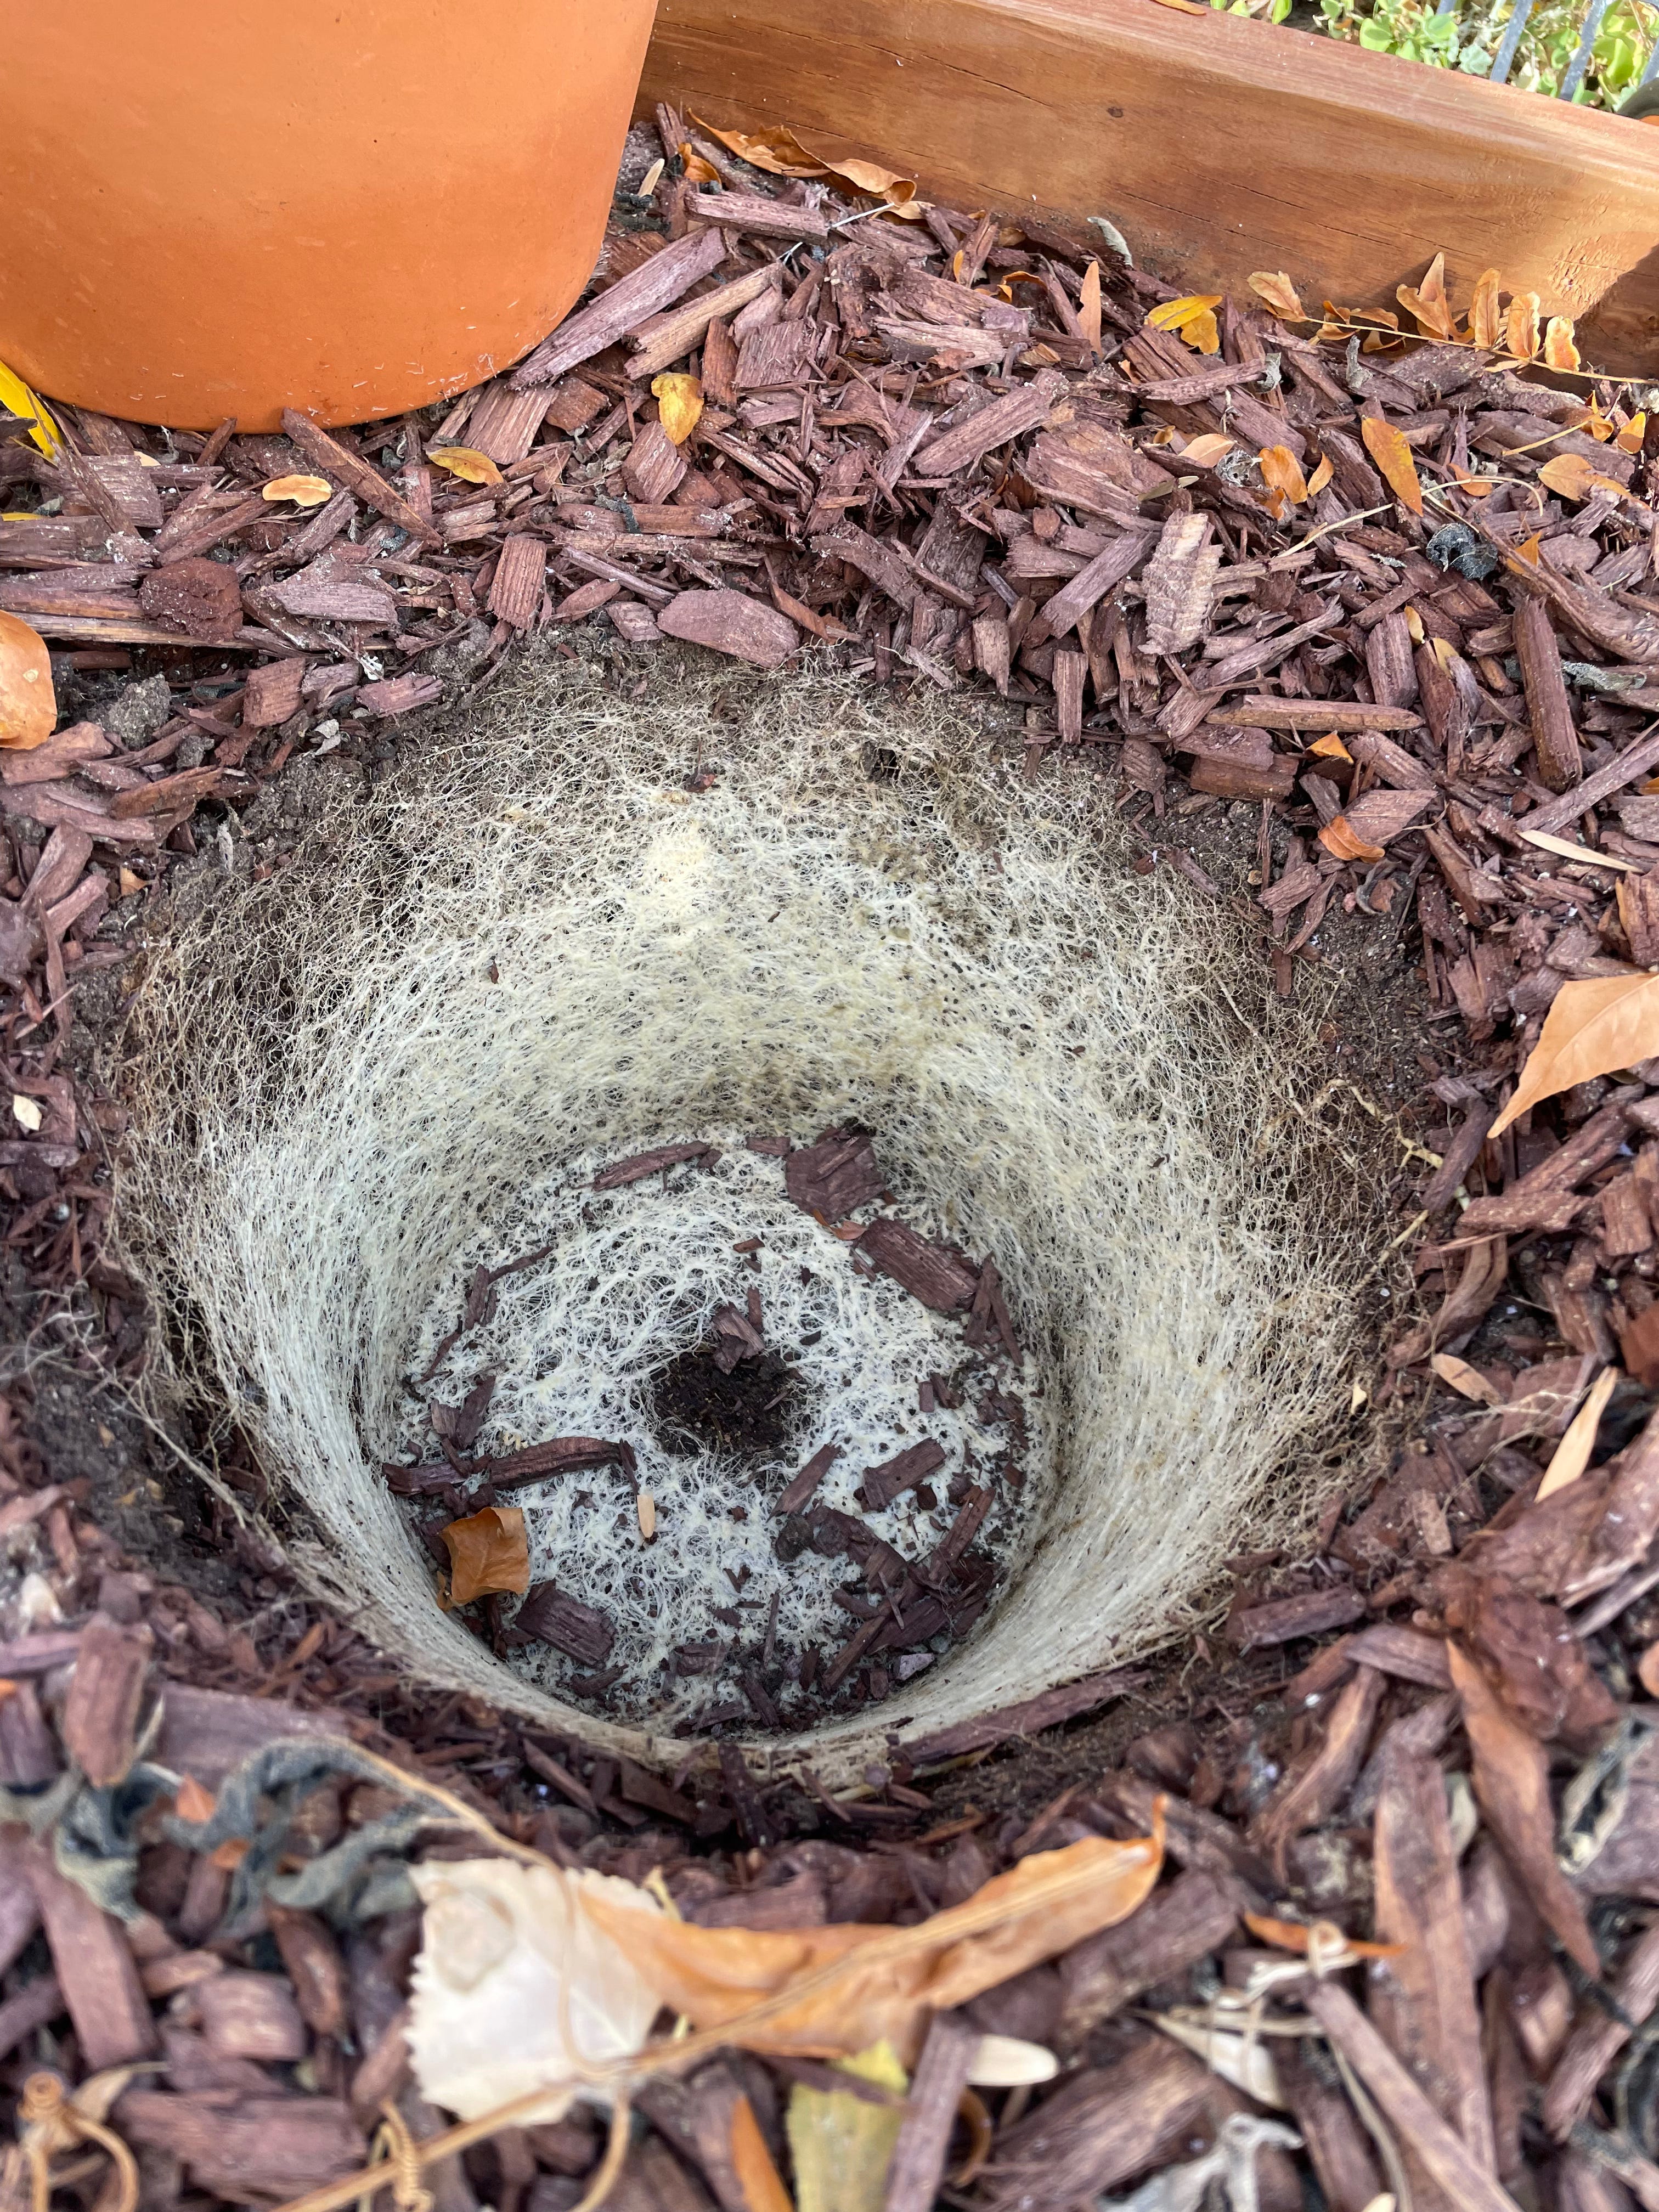
Root Development: Plants naturally grow roots around the olla to access the moisture. When I pull up an olla in the fall, it's often surrounded by a thick net of roots.
For example, I love using ollas when growing pumpkins, squashes, and melons. When I dig them up in autumn, the olla is wrapped in roots. Those plants have spent all season drawing from that consistent moisture source.
Types of Ollas I Use
I use four different types of ollas, depending on the context. Each has its own benefits.


1. GrowOya Olla
This unglazed terracotta vessel comes in various sizes and includes a silicone lid. I use these in pots and raised beds. Their generous volume means I don’t have to refill them as often, though they do need to be dug up and stored during winter to avoid cracking. I keep mine in a greenhouse, and as long as they’re dry, they hold up just fine.
2. Thirsty Earth System
This is a modular system of smaller ollas connected by tubing to a shared reservoir. I use them extensively in my vegetable garden—for tomatoes, peppers, and cucumbers. The system comes with a plastic reservoir you fill every few days (more frequently in hot weather). Each olla draws from the reservoir until it’s empty.
I also use this system in pots along my fence, filled with thirsty tropicals like canna lilies. The consistent hydration has kept them healthy and blooming earlier than ever.
3. California Pot Company Olla
This hand-thrown, unglazed terracotta olla has a sleek cylindrical shape that fits well in many pots. It keeps container plants hydrated for longer, and its straight sides make it easier to store in winter than more bulbous designs.
4. DIY Ollas
Making your own olla is simple and cost-effective. I use 12-inch terracotta pots for large plants like watermelons and squash. To convert them into ollas:
Plug the drainage hole with a flat stone, bathtub stopper, or recycled plastic, sealing it with waterproof silicone.
Let the seal cure for 24 hours, then fill the pot to test for leaks.
Cover the top with a plastic saucer to prevent evaporation, weighing it down with a brick or rock.
DIY ollas are easy to stack and store for winter, and perfect for gardeners on a budget.
Buy the materials you need for DIY ollas here, and check out this link for more instructions:

Getting Started with Ollas
I typically install ollas before planting, then position plant starts close to them so roots can find the moisture source quickly. No matter what system you use, you’ll need to water regularly for the first few weeks to help roots establish and to hydrate the surrounding soil.
If the soil is especially dry, water from the olla will wick quickly into the ground. For example, when I installed my thirsty earth system in a new veggie bed, I was refilling the reservoir daily at first. But now, as the system has stabilized, I refill it every 5 to 7 days.
Healthier Plants, Fewer Problems
Ollas have dramatically improved the health of my garden. One major benefit: no more blossom end rot in tomatoes. This frustrating issue is often blamed on calcium deficiency, but it's usually caused by inconsistent watering. Ollas maintain even moisture levels, allowing your plants to take up nutrients steadily.
Need more tomato-growing tips? Check out this guide:
Ollas are a fantastic, low-tech irrigation solution. They save water, promote healthy root systems, and reduce plant stress. Pair them with other water-wise practices—like mulching and grouping plants with similar needs—and you’ll see a big difference in your garden.
There are links to all the products and resources I mentioned below. Don’t be afraid to mix and match systems based on your needs. And one last bonus: with ollas, you don’t have to worry so much about your garden when you go on vacation!
If you have any questions, drop them in the comments and I’ll be sure to answer. And don’t forget to like and subscribe.
Happy gardening!
Angela

I got some gadgets made of clay that you put an upside down wine bottle in. I didn't realize that I should put them in early and leave them there in the pots. I only used them when i went on holiday. I see having them in the pot longer, they would have worked better. Thanks for the information.
Could you use an olla system when you plant a baby tree or a new shrub. You wouldn't want to disturb the roots to dig it out though.